

Burn Brush Tool Affinity Designer
Use the Calligraphic Brush tool to create decorative type
- Software: Illustrator CS4 or later
- Project time: 3-4 hours
- Skills: Set up calligraphic brushes to save time creating custom lettering, understand key functions of the Pathfinder menu: unite/Minus Front, use Scissors to break up paths, expand single strokes into vector shapes, use and edit the Blend tool to make simple patterns
With calligraphic and hand-drawn typography facing a resurgence lately, I will show you how to create your own custom typography quickly and easily in Illustrator.
Taking you through from a hand-drawn template to the final image, I will teach you how to set up your own calligraphic brushes to mimic the chiselled nib of a classic calligraphy pen. You will also learn how to use the Scissors tool to divide and separate paths into multiple sections without breaking a line, and the Expand Appearance option to turn single-lined paths into full vector shapes for refinement.
In addition, you will gain knowledge of how to use the Unite and Minus Front functions in the Pathfinder panel to refine any corners and curves. You will then be able to create your own custom titles to add a personal touch to your designs.
Step 01
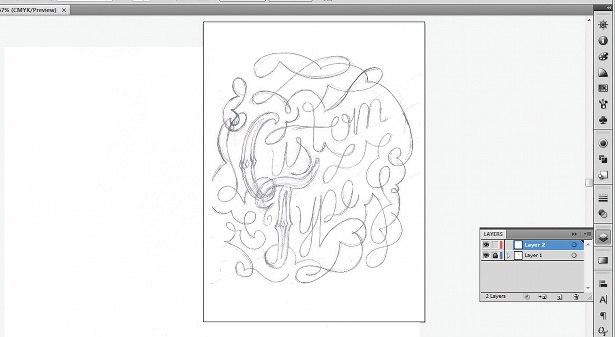
Start by drawing out a rough template for the layout of your type. It doesn't need to be absolutely perfect, as it will most likely go through various changes and refinement throughout the process. Just focus on nailing the basic layout of your piece: work out how you want to form your letters and plan any extra ornamentation or swashes that you want to include.
Step 02

Scan in the sketch, open it in Illustrator and place it on your Artboard, resizing it to fit (at this stage any pixelation doesn't matter – so long as it's clear enough to actually trace). Lock the layer and create a new layer. On the new layer, select the Pen tool and trace round your sketch.
Step 03
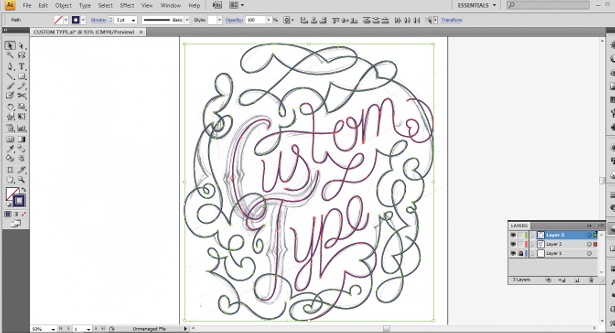
You don't need to trace around each element exactly as it was drawn, as the sketch was only a guide – you might decide to change or perfect certain parts as you go. It's a good idea to separate the flourishes and swashes onto different layers to the main text – this will make things easier later on.
Step 04
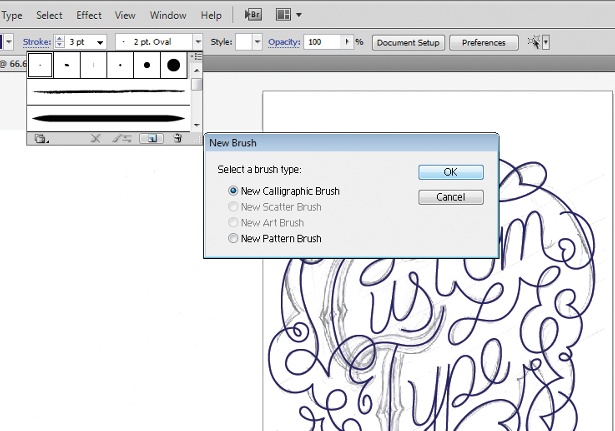
Now that we have all our letters as single width strokes, it's time to create the calligraphic brushes. Choose the Direct Selection tool. This will bring up the Brushes panel. Select the drop-down menu, click New Brush and then select New Calligraphic Brush.
Step 05
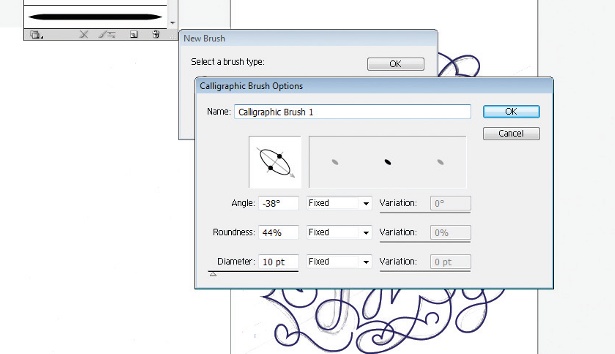
At this stage, you are able to adjust the angle, roundness and diameter of the brush. I generally leave the diameter at its default setting – we will be adjusting this individually later on via the normal Stroke Widths panel (Width Point Edit panel). Generally, calligraphic pens are held at a 45° angle, but anything between 30° and 60° should give the desired effect. The lower you make the roundness value, the more variation there will be between the thick and thin stroke widths.
Step 06
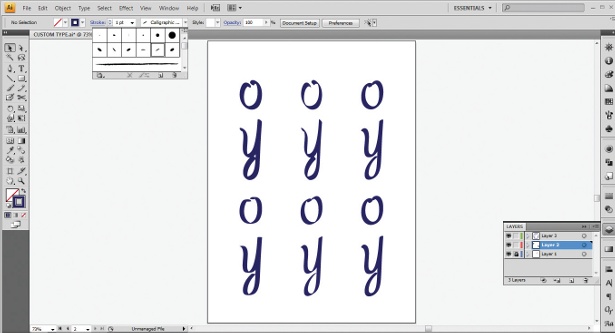
Create a range of differing brushes so that you can experiment with different styles. I usually separate two glyphs from the main piece (in this case the 'o' and 'y') to test out the different brushes.
Step 07
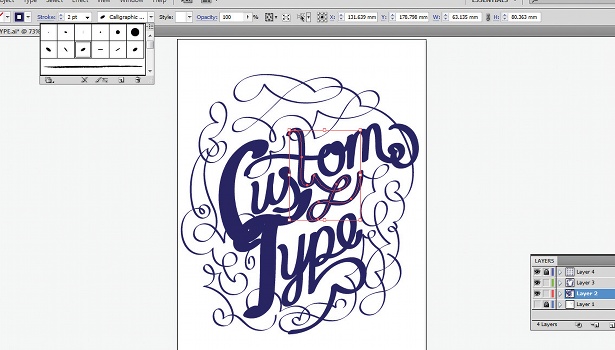
Once you have selected the brushes that you want to use, it is time to select your letters and give them your chosen brush strokes. Some of the strokes will overlap each other at the moment, but you can sort that out later on. I have given them all a stroke width of 2pt (5pt for the capitals – this is optional depending on your design). I wanted the flourishes lighter so I used another brush and a width of 0.5pt.
Step 08

Now we can go in and change some of the stroke widths. This is to mimic the lighter pressure used on certain strokes of the letters – particularly the joining strokes. To do this, select the path you want and then choose the Scissors tool. Simply click directly on the path at the point where you want it to break apart, and you can change each letter into any number of separate paths.
Step 10
Once you have broken up the letter, you can start changing the stroke widths of the different parts. Try to keep to a set of two or three widths though, to keep coherence between your letters. You can either lower the point size or select a similar brush for these strokes but, again, keep it uniform between the letters. Here I have chosen the same brush that I used for the flourishes, but at 1pt.
Step 10
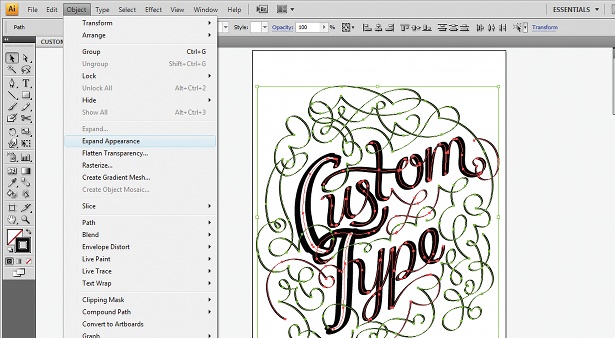
When you have edited all of the necessary stroke widths, choose the Direct Selection tool, and edit the paths and curves – you can also move some if you need to. This is to allow for the wider angled strokes, and will help finalise the layout and positioning. Now select all the stroked paths and go to Object>Expand Appearance to expand them into vector shapes.
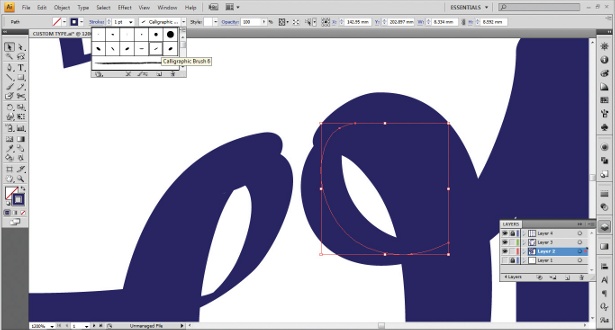
Step 11
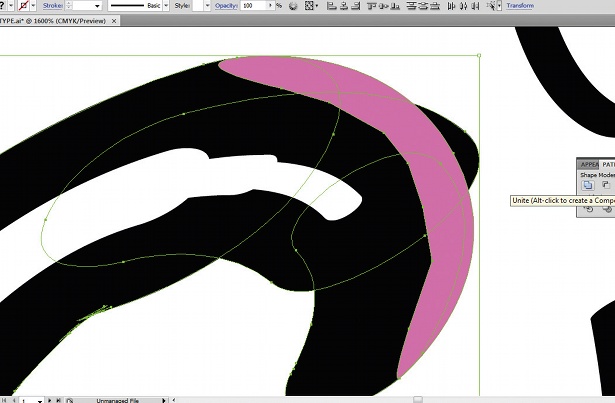
The next step is to smooth off all the joins at the parts where you have changed the stroke widths. To do this, use the Pathfinder menu. Zoom in on the area you want to edit, and draw a shape over the top of the section, making the outside edge precisely how you want it. I have used pink here to stand out, but keep it the same colour as the letter. Highlight all of the shapes you want, and hit Unite.
Step 12
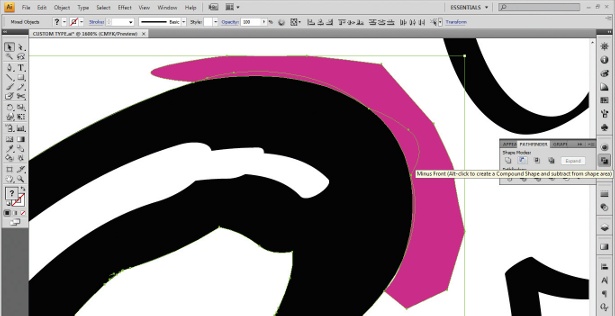
Once you have filled in the gaps, trim off the excess lumps of each curve to make it perfectly smooth. To do this, draw the curve again how you want it, but rather than filling the positive space of the letter, fill the negative space around the edge. Again, I've just used pink to stand out – you should keep it the same colour. Next, highlight the shapes again and click Minus Front.
Step 13
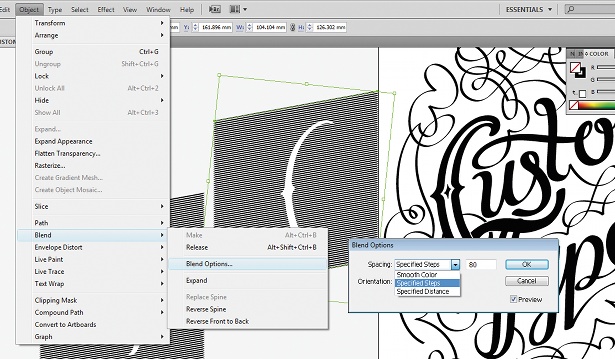
This step is optional. I have chosen to use some simple ornamented caps for this piece, but you might not want these in your design. I have used a series of horizontal lines and shaded the inner part of the caps, by drawing two identical horizontal lines – one above the other. Next use the Blend tool (Object>Blend>Make) and go to Object>Blend>Blend Options to edit the amount of lines. Lastly, copy the paths from the inside of the caps and use them as a clipping mask.
Step 14
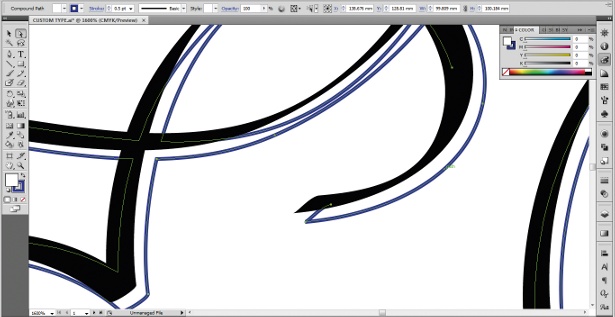
Again, this step is optional. For some added interest to your lettering, try introducing a pin-line shadow. The easiest and quickest way is to select everything (minus any decoration), click Unite and then duplicate the selection. Place this underneath the lettering and remove the fill, but add a thin stroke of a colour or black. Then place it slightly below and to the right of the original lettering. You might need to delete some lines on the very thin strokes.
Step 15

You're now ready to add the final elements. My piece is a standalone typographic image, so I added a border around the edge to frame it, and then some extra flourishes extending right up to the border. At this stage you can experiment and add to it as you wish, or you can import the vector title into your layouts if the piece is to be used in a spread alongside other content.
Liked this? Read these!
- Download the best free fonts
- Free graffiti font selection
- Free tattoo fonts for designers
Related articles
Burn Brush Tool Affinity Designer
Source: https://www.creativebloq.com/illustrator/create-decorative-custom-type-illustrator-5132684
Posted by: hubbardhithorable.blogspot.com
0 Response to "Burn Brush Tool Affinity Designer"
Post a Comment